How to create a monitoring queue
This topic describes how to create and configure a monitoring queue for the target's voice, data and text. To creating a monitoring queue for their social media refer to How to create a monitoring queue for social media.
You can either assign individual users to a queue or you can assign monitoring stations to a queue. Assigning monitoring stations simplifies the administrative process of configuring the multiple different users who are monitoring the subject throughout the period of the warrant. You must first add a user account for the station, as you would for a normal user, for example you may want to add one with the first and last names being "Monitoring Station1". For further information refer to Setting up a person or a station for live monitoring.
-
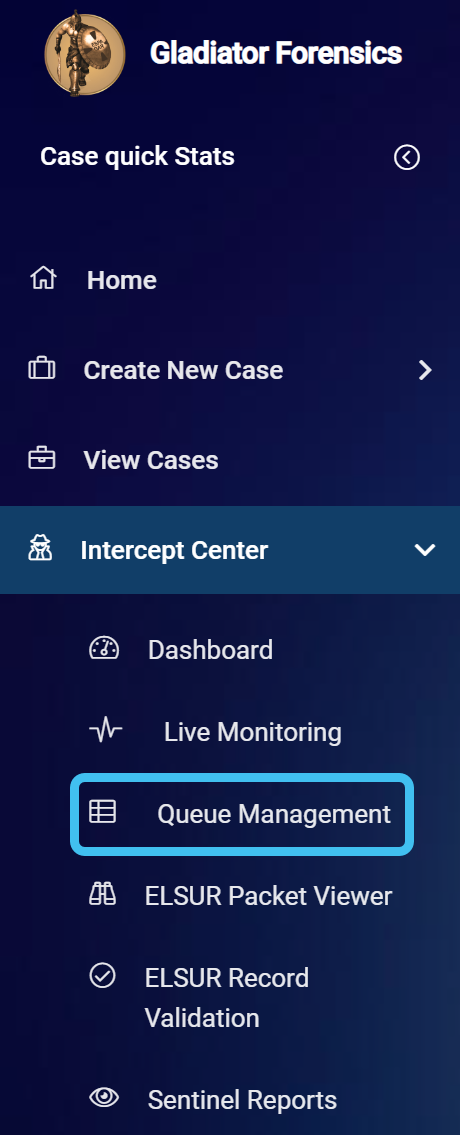
On the main menu click Intercept Center, then click Queue management.
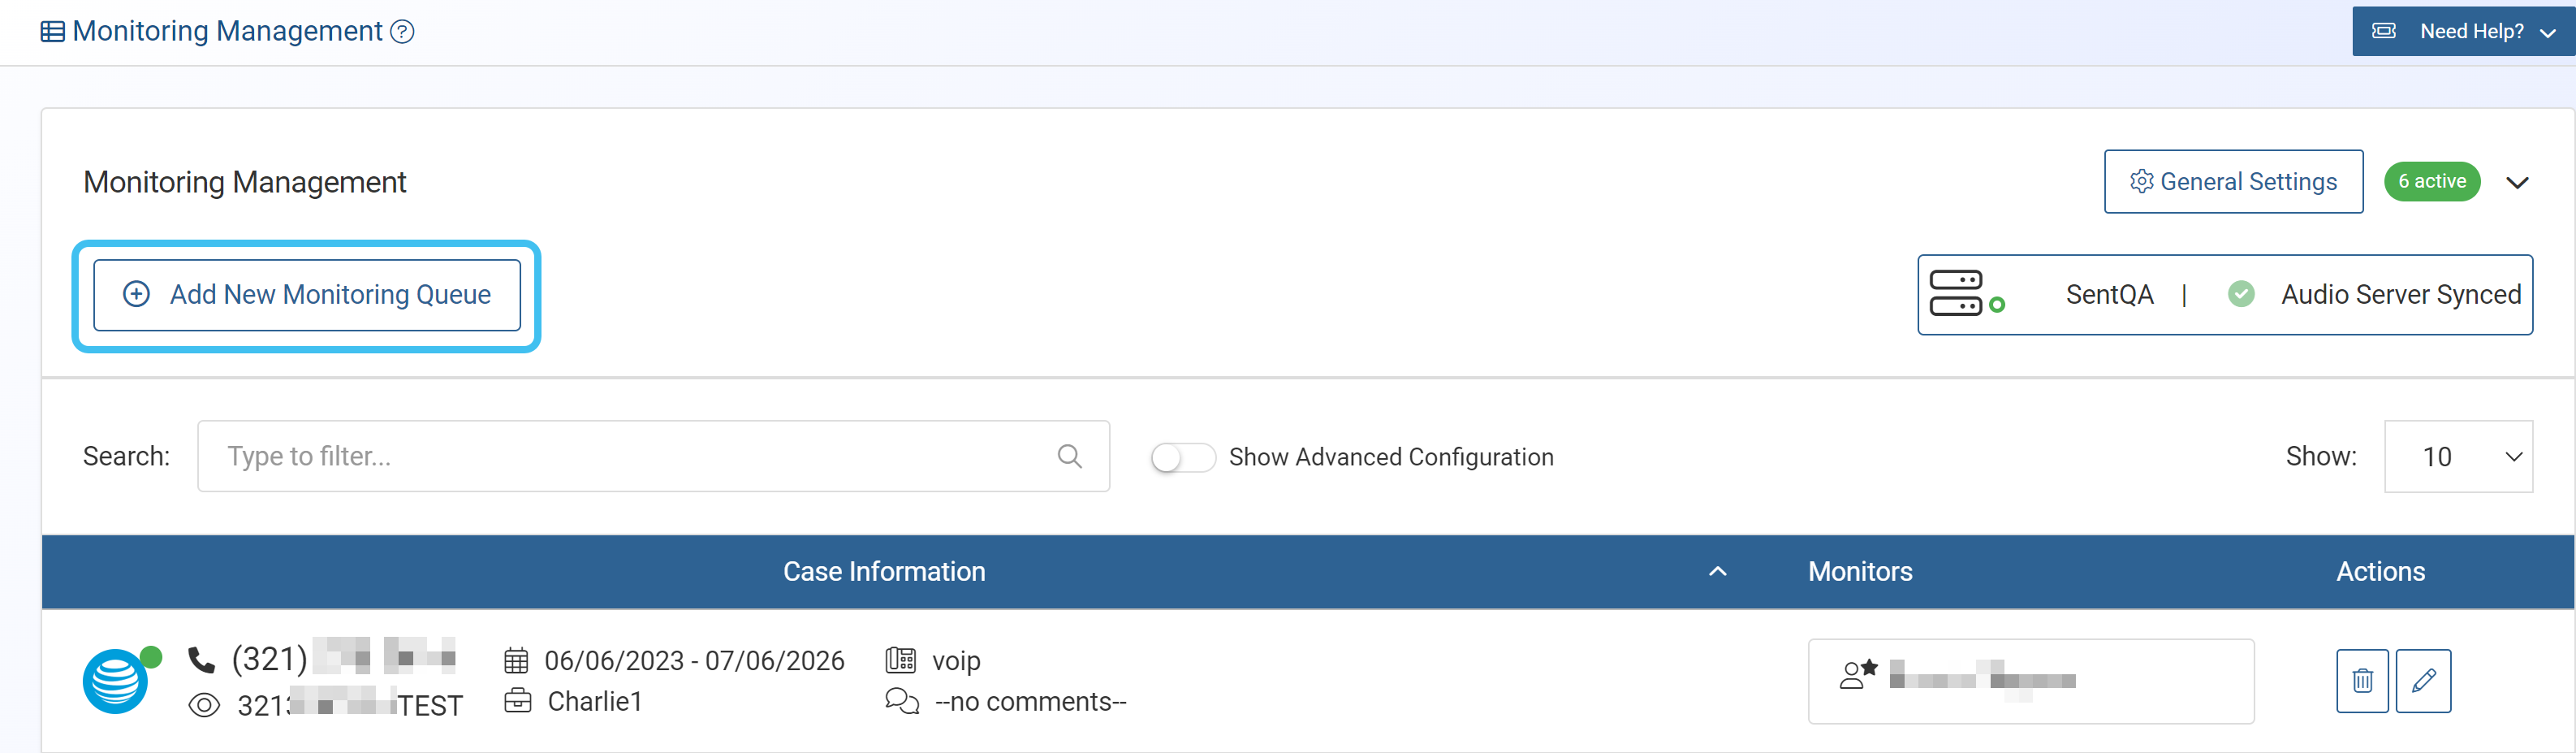
The Queue management screen opens.
-
In Monitoring management click
 .
.
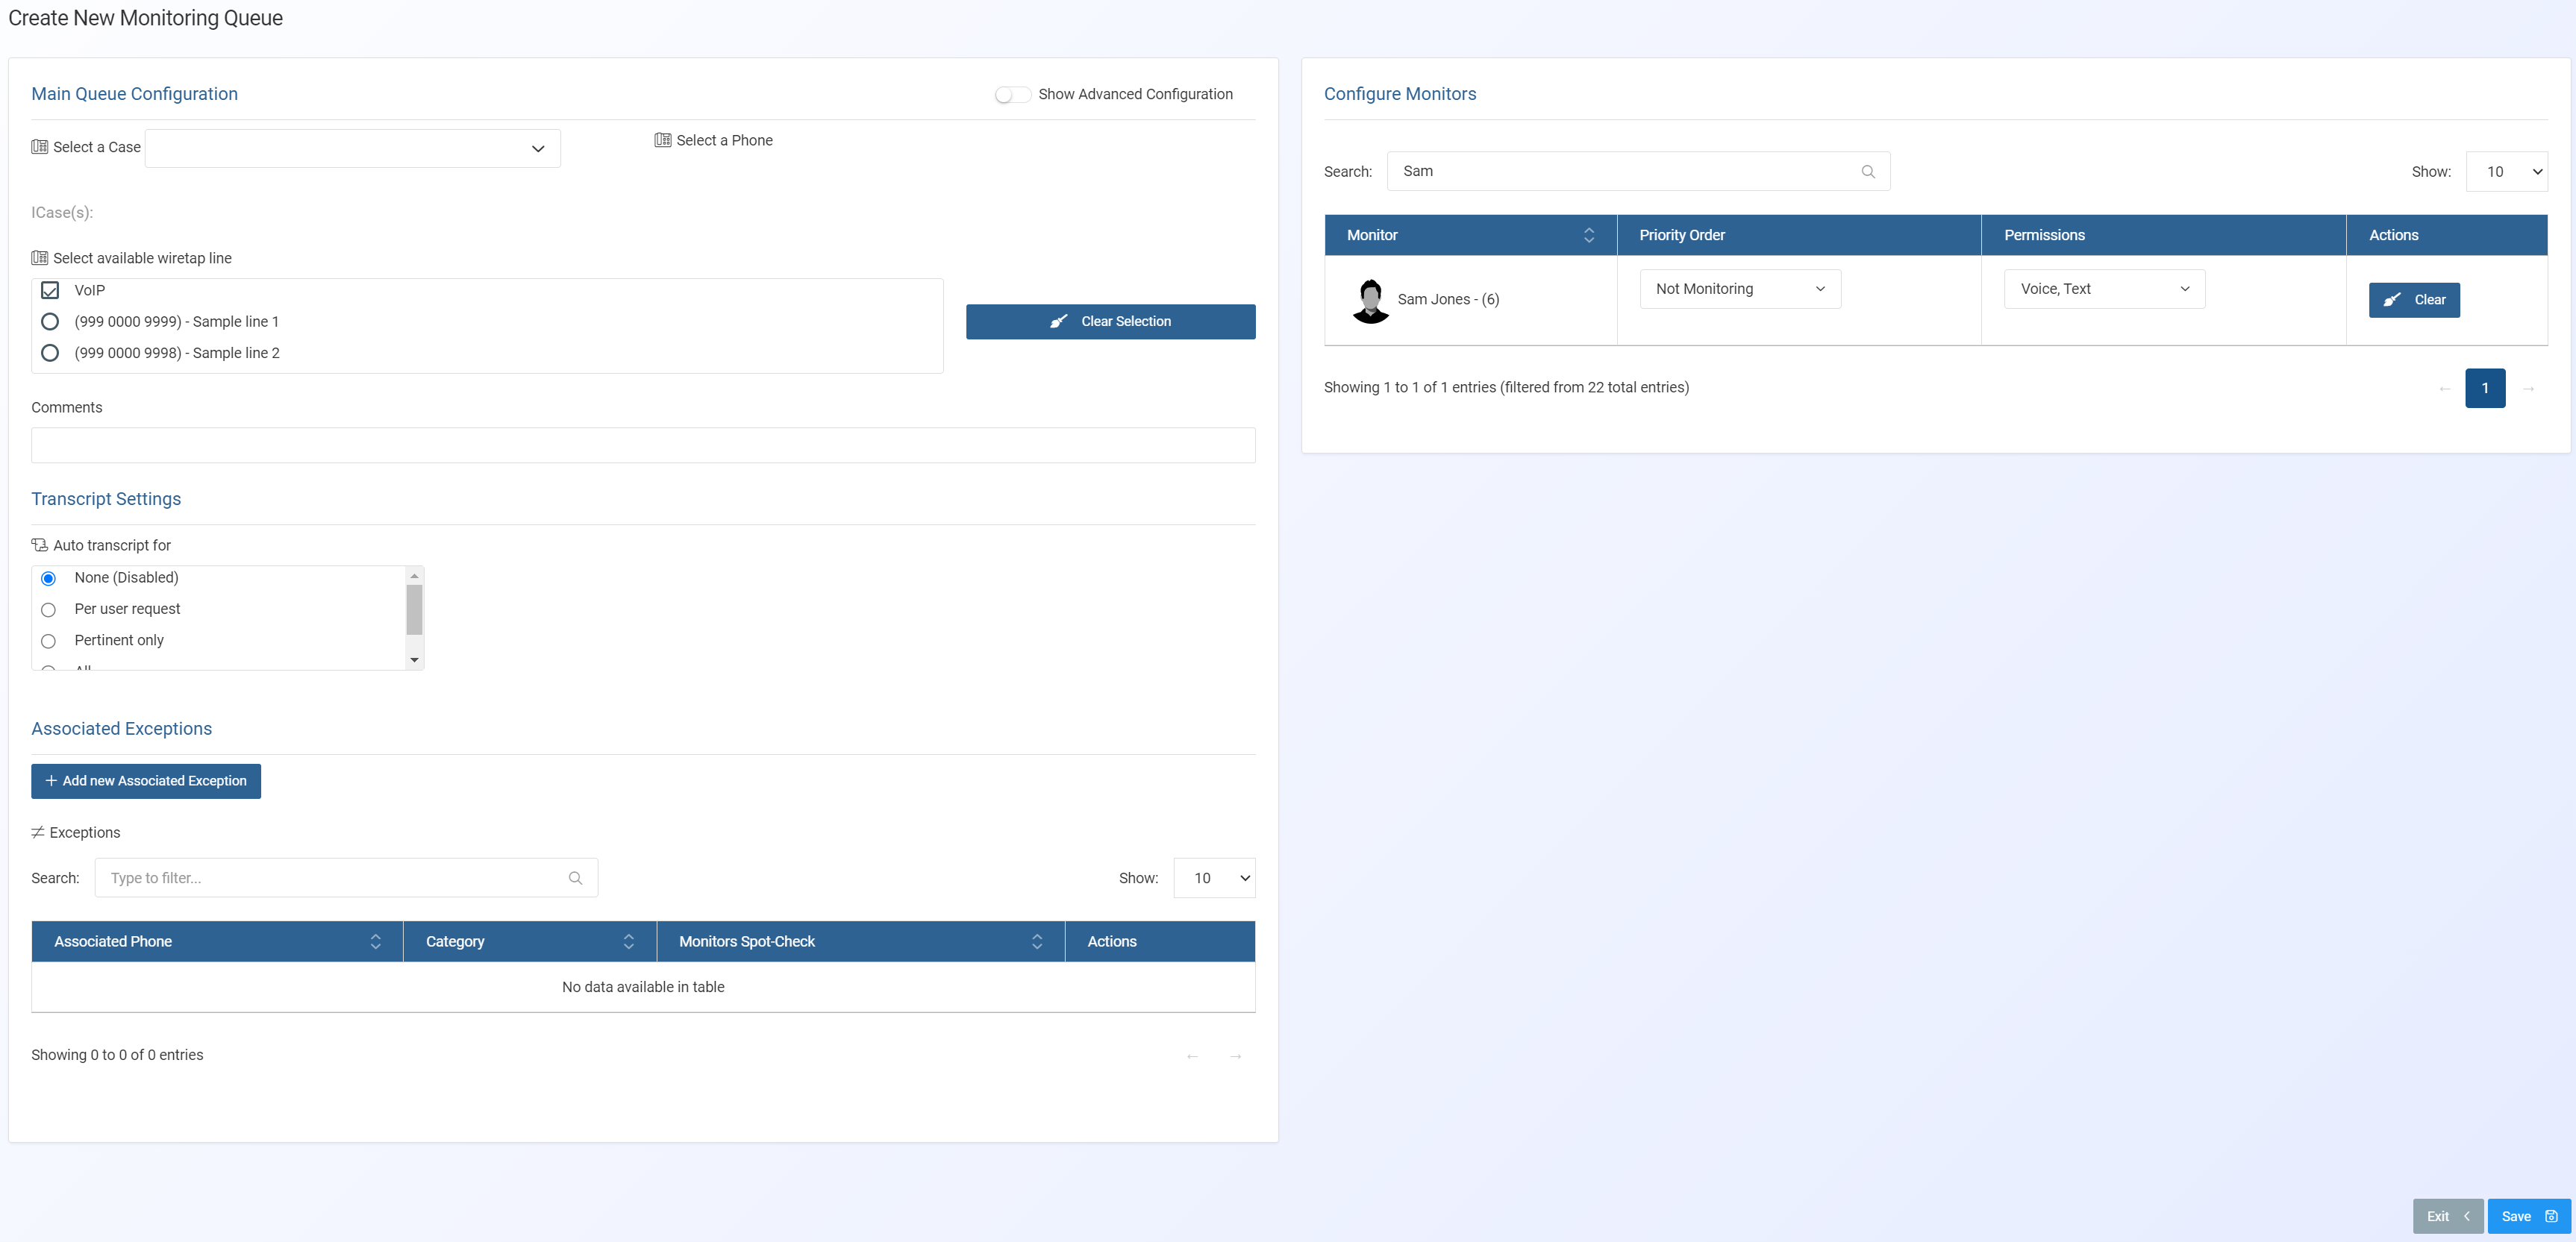
The Create new monitoring queue screen opens.
-
In Main queue configuration:
-
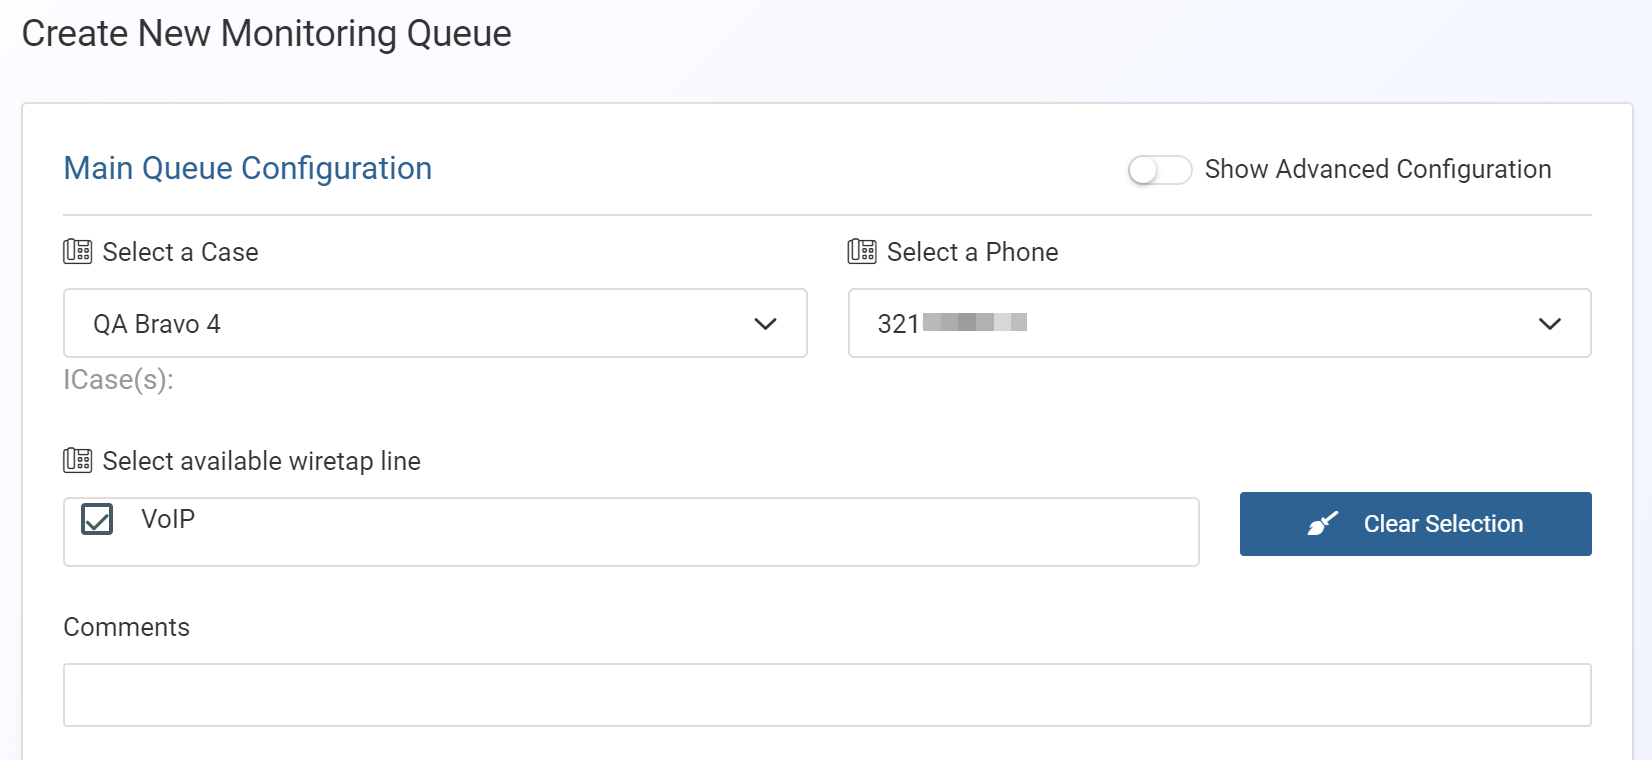
In Select a case, for the case you want to configure the monitors and wiretap line for, enter all or part of the case name then select it from the menu.
-
In Select a phone, from the menu, select the phone you want to configure the monitors and wiretap line for.
-
In Select available wiretap line select through which telephone line you want the call to be delivered.
-
If required, in Comments enter any text that will help you identify this configuration on the Queue management screen.
-
-
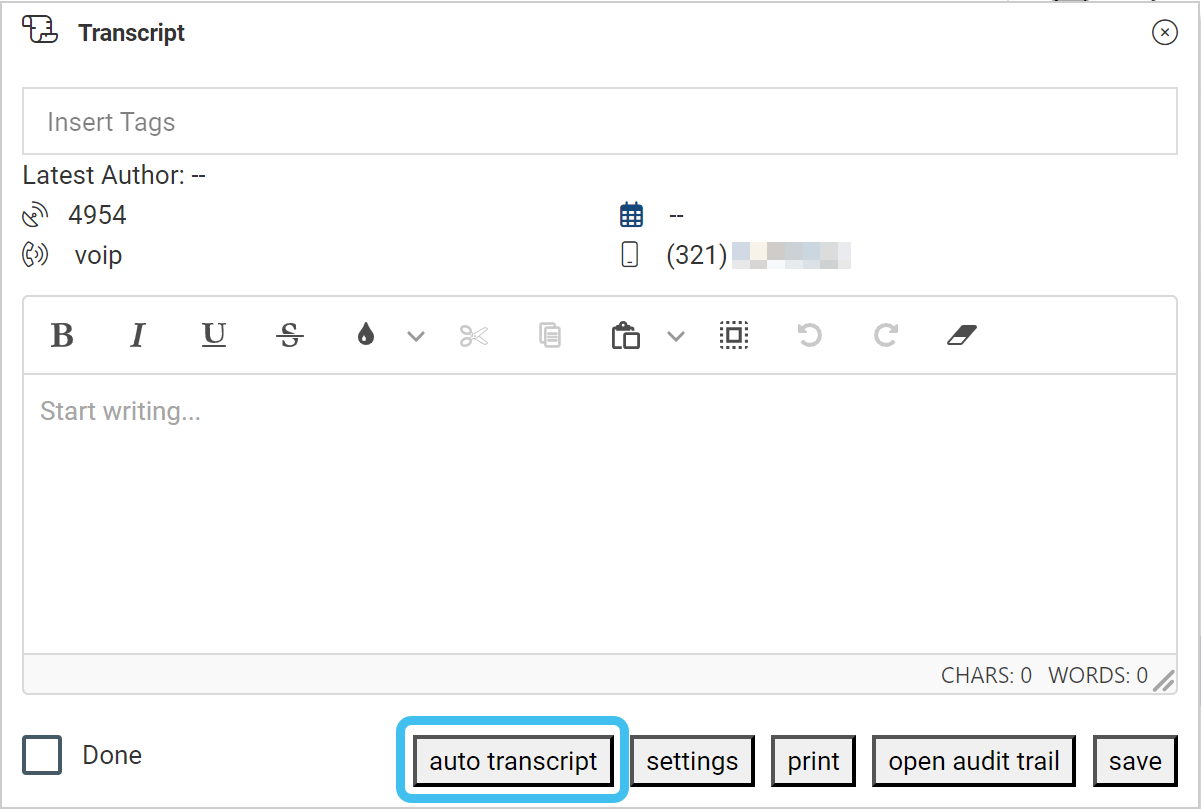
In Transcript settings, select the method you want used for the auto transcription of calls once the call has ended.
-
None (Disabled): no calls on the monitoring queue can be auto transcribed. This is the default setting.
-
Per user request: this provides an auto transcript button on the Transcript dialog box which allows the monitor to decide which calls are auto transcribed. This is the most commonly used setting. Note, if the monitor enters a transcription manually then it is no longer possible to request an auto transcription and the auto transcript button does not display.
-
Pertinent only: when the call category is set to pertinent then a transcription is automatically created.
-
All: transcriptions of all calls, including unattended calls, are automatically created. This setting is not commonly used due to the large number of calls, most of which do not contain pertinent information.
-
-
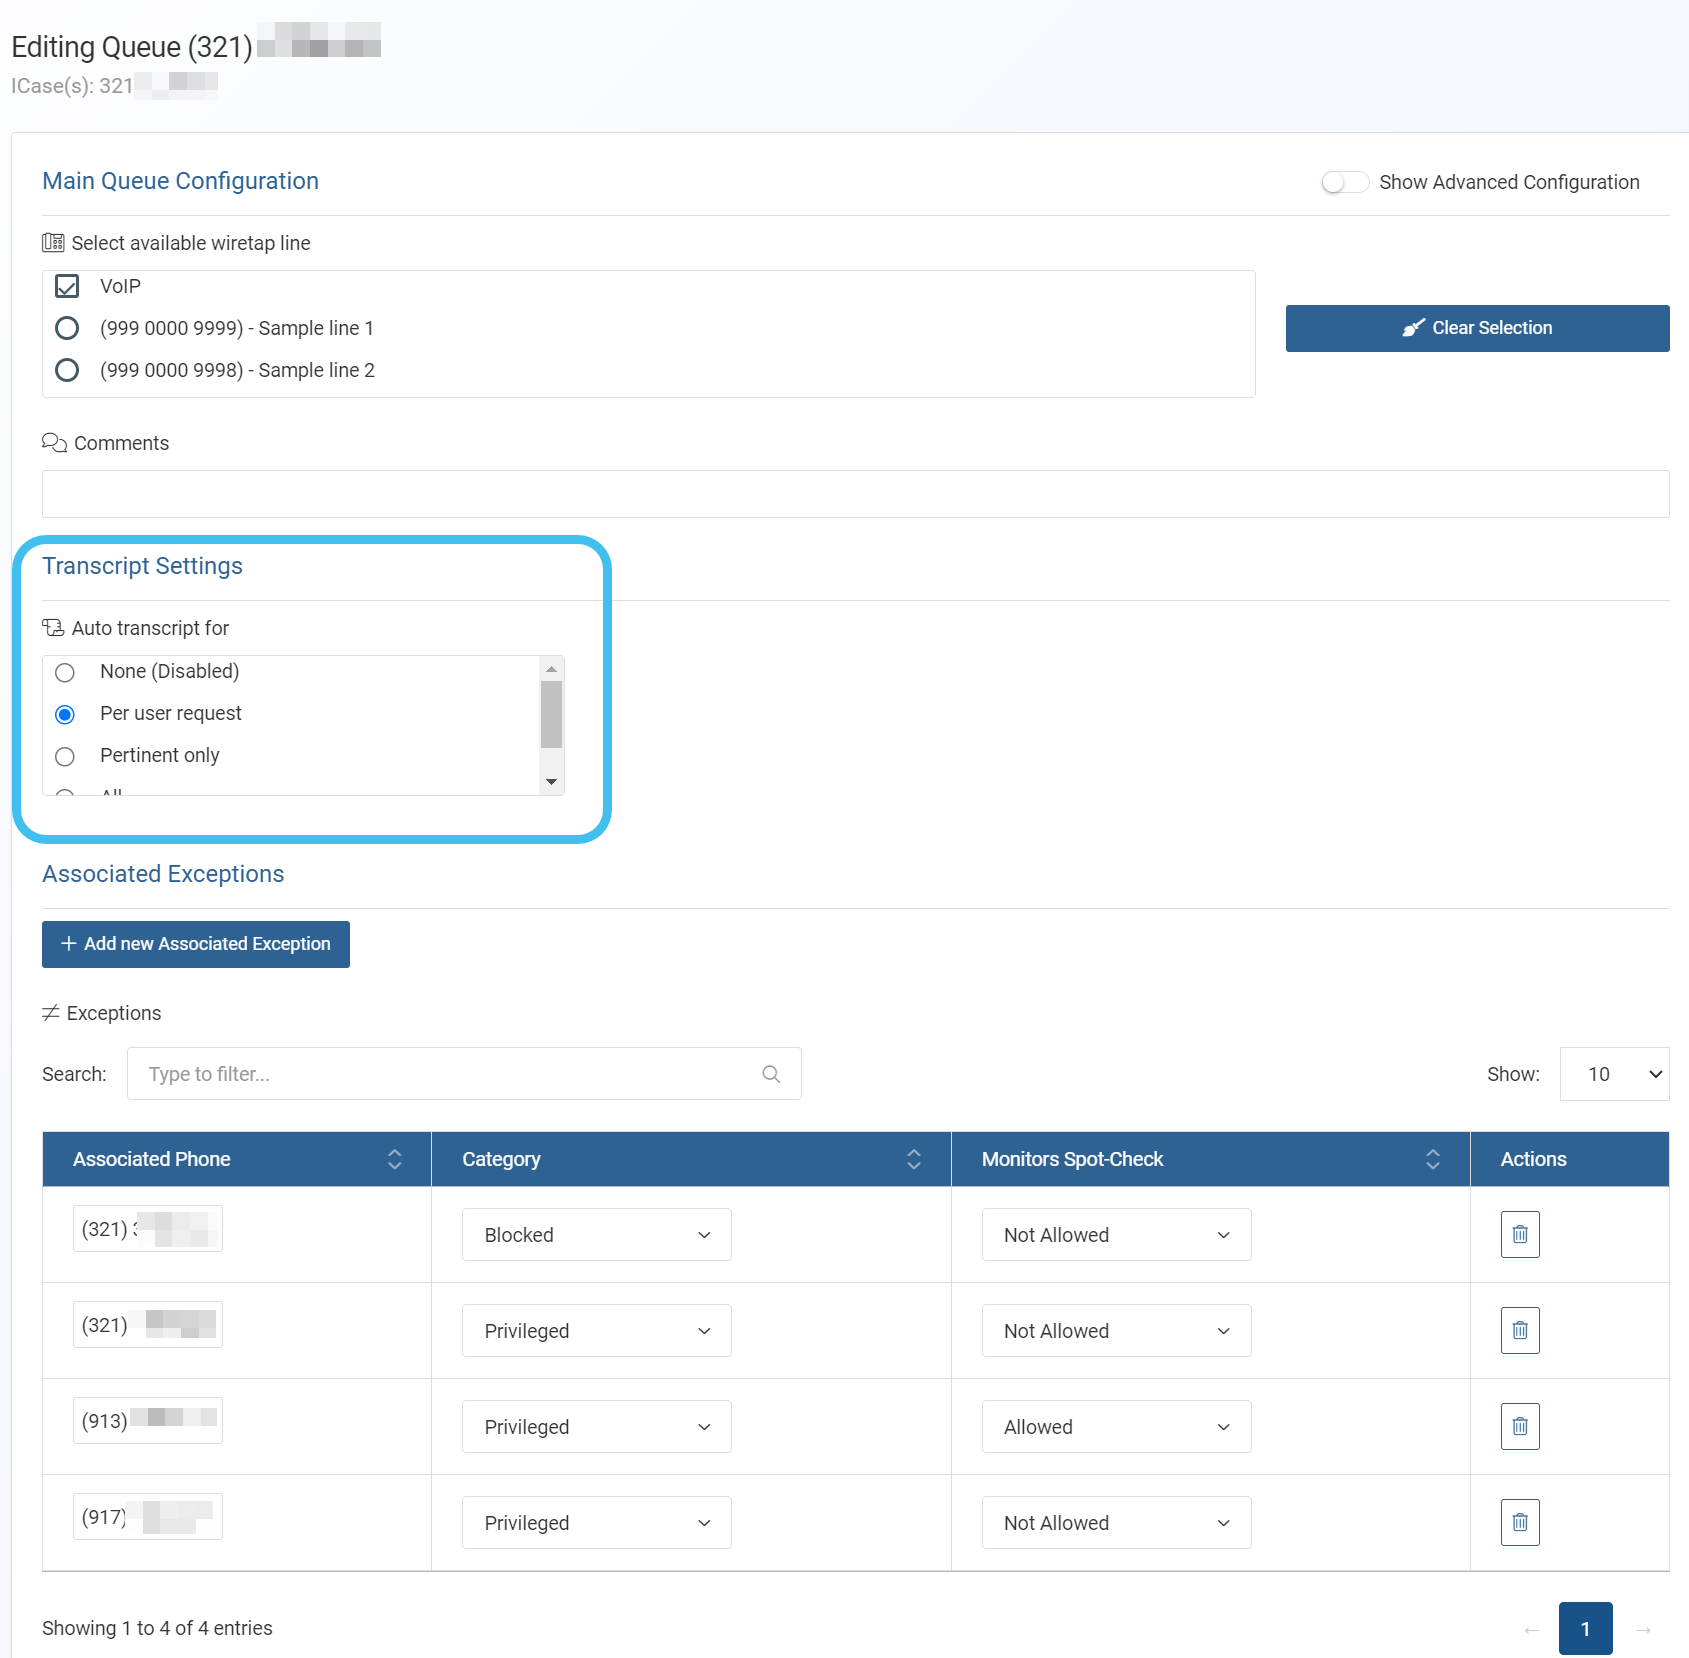
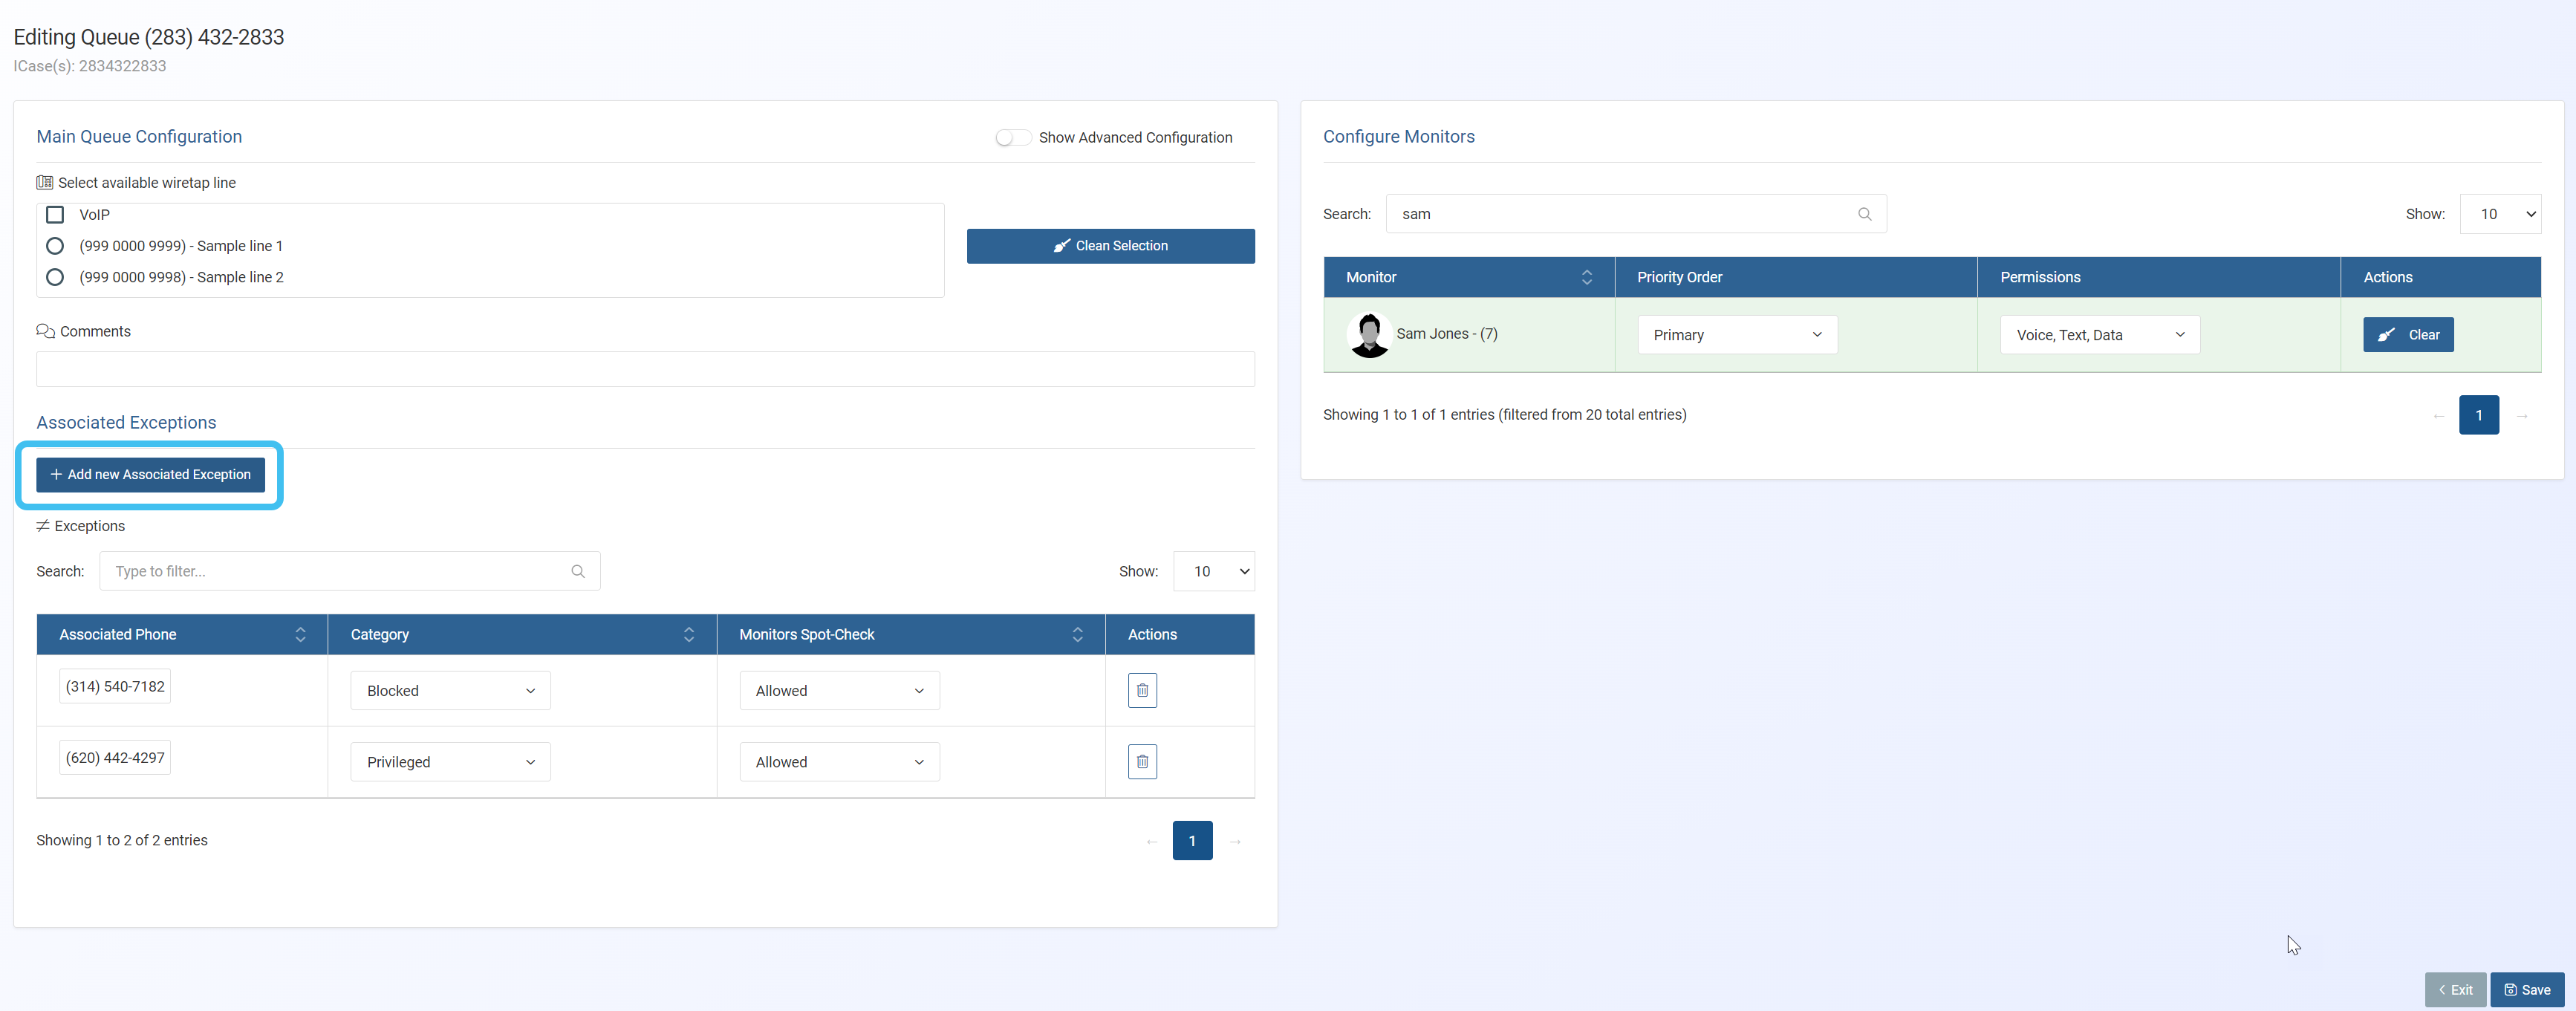
Associated exceptions allow you to define how certain associate phones numbers are handled by Live monitoring. This can be useful for example with the target's lawyer's phone number. To add one:
-
Click Add new Associated Exception.
-
In Associate Phone enter the phone number.
-
In Category select from the menu the category you want the phone to automatically be characterized with. The only difference between Blocked and Privileged is that when a monitor is logged into the queue, with Blocked the call is recorded but with Privileged the call is minimized. For further information refer to Category.
-
Use Monitor can spot-check to select whether or not you want to allow the monitor to occasionally listen into the call. For further information refer to Monitor can spot-check.
-
Click Add in Exceptions List.
Your exception is then added to the table where you can edit or delete it if required.
-
-
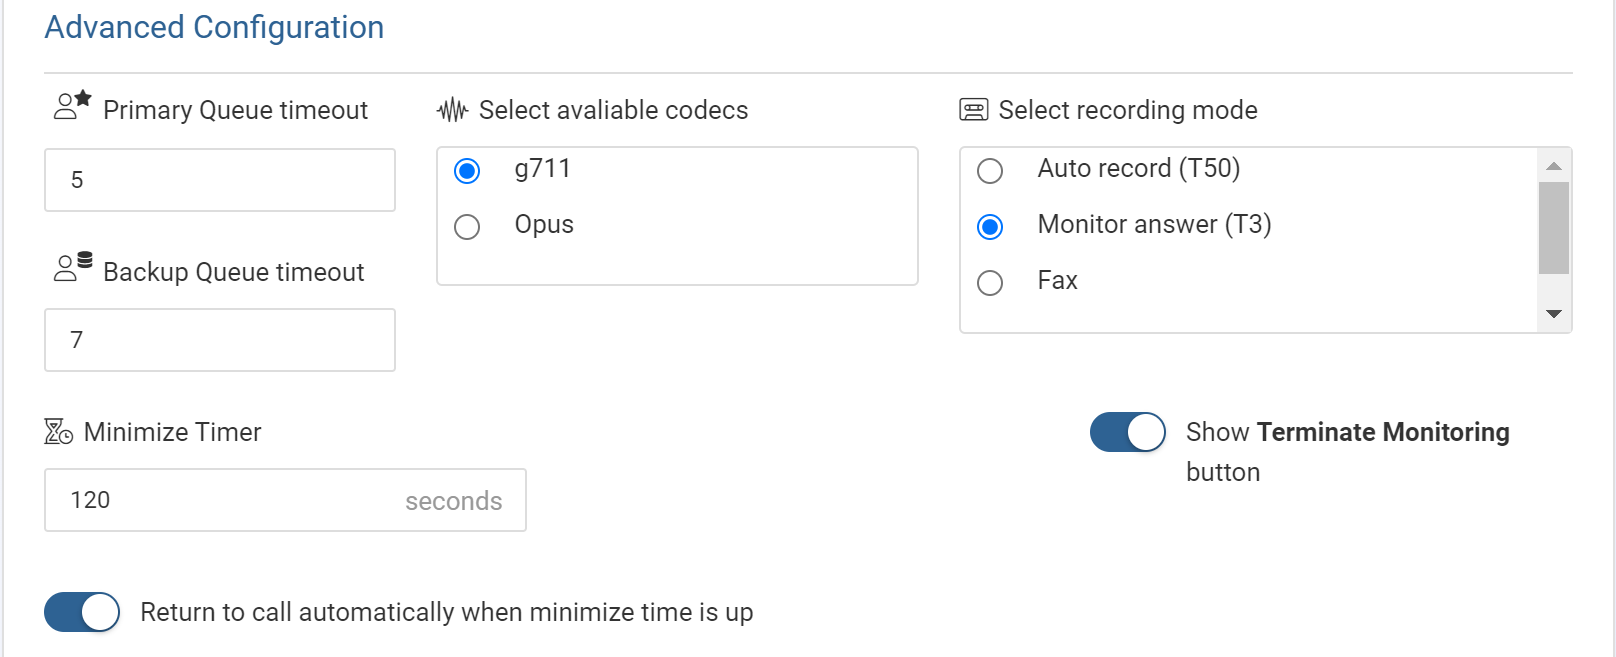
This step is typically not required but if you want to change any of the default settings then click Show Advanced Configuration.

Edit the timeouts, codec, recording mode, minimizer timer, the terminate monitoring button and the SMS/MMS mandatory categorization as required.
-
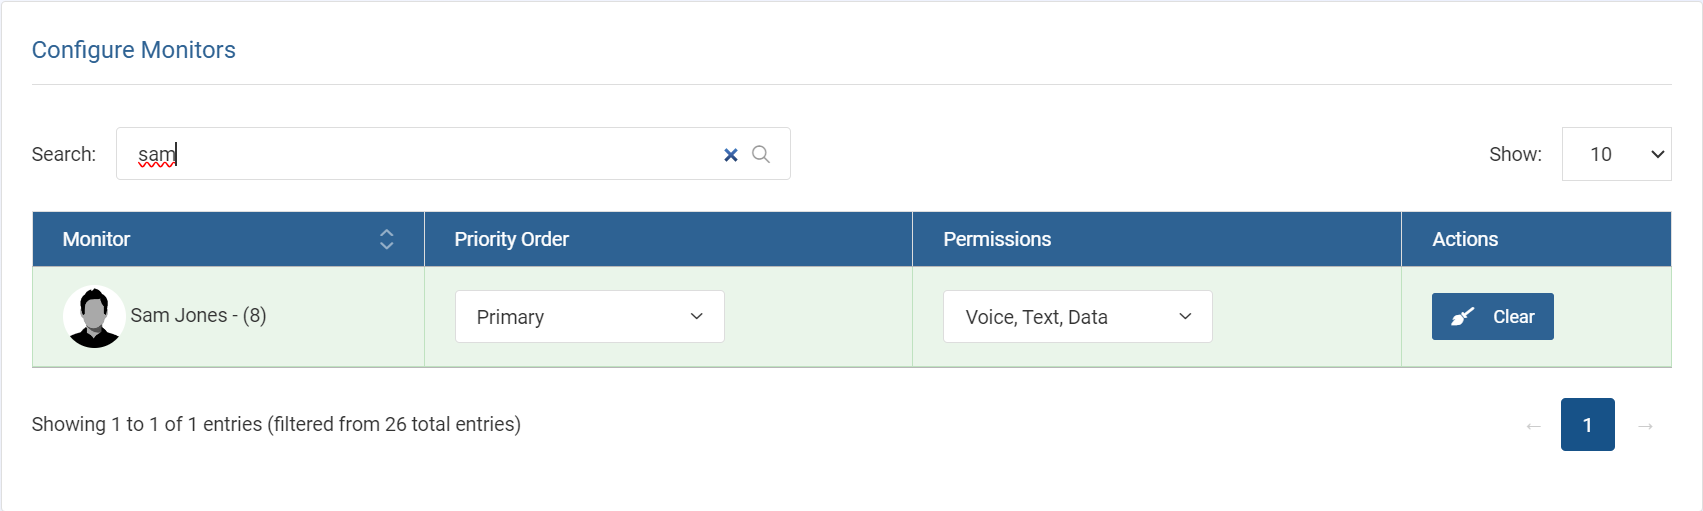
In Configure monitors:
-
In Search, depending on whether you are setting up an individual user or a station, enter either the name of the monitor or the name of the station. The names that are available to select are those who have been set up to monitor as a User or as a Station by your administrator.
- In Priority order select whether the monitor is a primary or backup monitor. It is recommended that you configure two monitors, one for each order.
- In Permissions select which content: voice, data and text, you want monitored. The only options that are available are those that you are legally authorized to monitor.
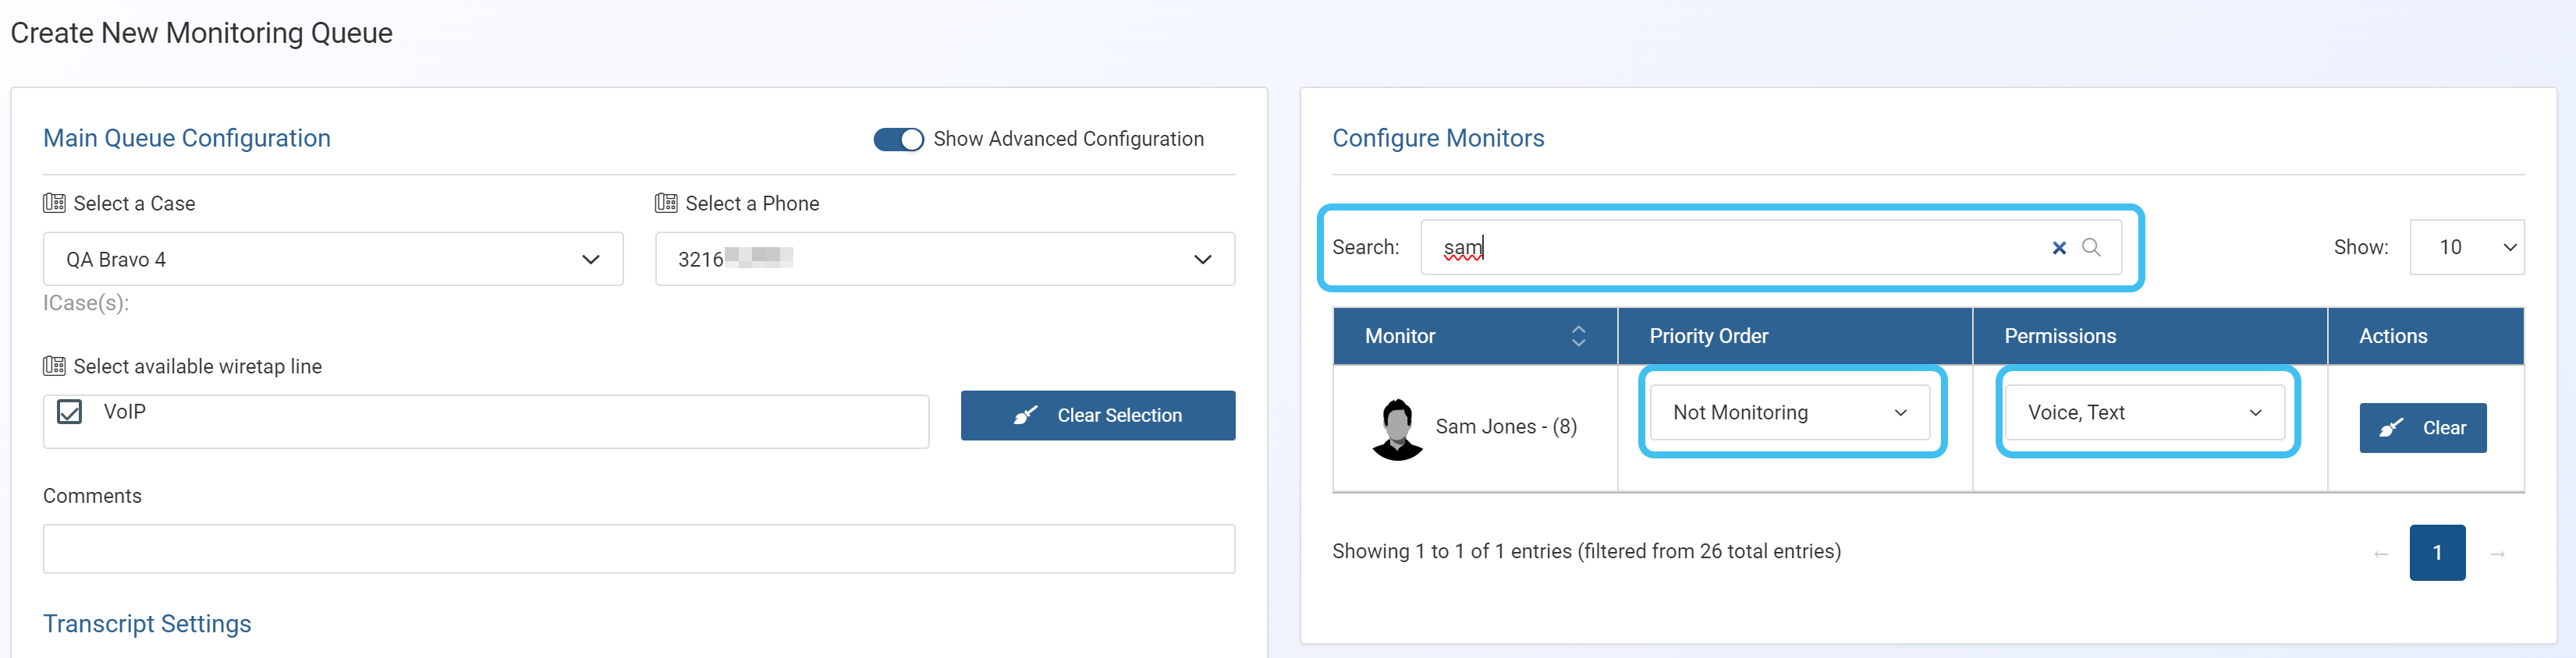
Once a monitor is added to the queue their name is highlighted in green.
-
-
After you have added all the monitors click Save.
The intercept is now available for the monitor on their Live Monitoring screen.